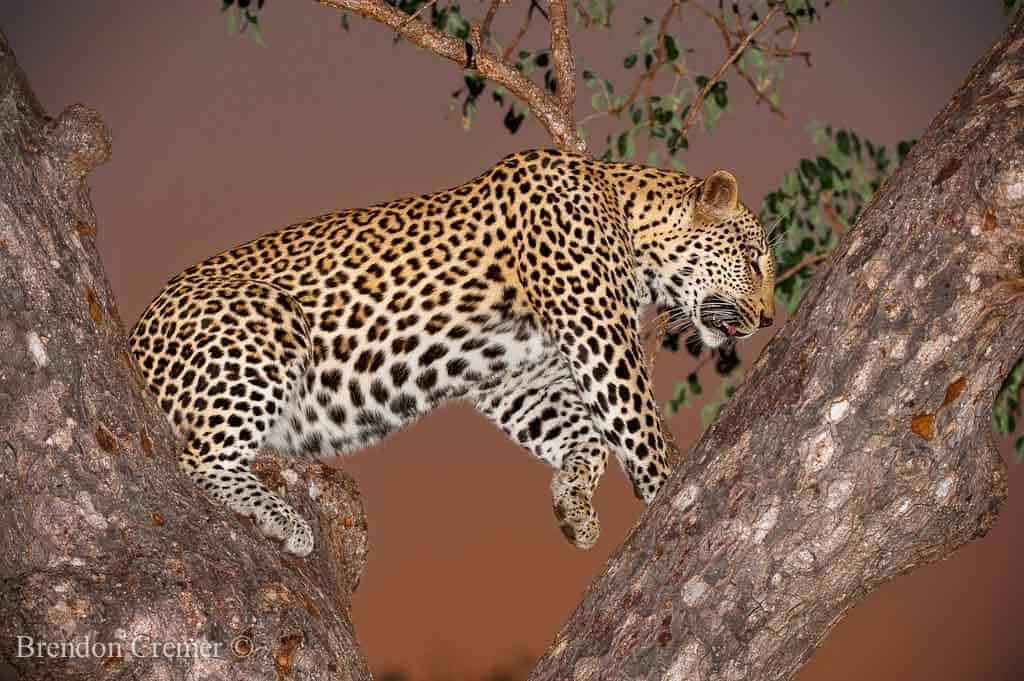
Dusk and dawn are photographically magical times of the day for flash photography.
The sky is usually at it very best 15 to 30 minutes before and after the sun has risen or set, that is weather permitting of course.
Combine these rich colours creating stunning backdrops with an interesting well-lit subject at exactly the right moment and… Boom!!!
You have a photograph that everyone takes a second look at, and a shot to be proud off.
This may look and sound complicated and difficult but in actual fact it is quite easy once you know how.
The most important aspect of getting this right is to take full control of your camera, you do not want the camera guessing in any way what you are trying to achieve. In order for this to happen you will have to switch to manual mode. At this point some of you may panic, DON’T its not that difficult, just follow these simple instructions.
Now with your camera on manual you have the ability to change your ISO, your aperture and your shutter speed. I would suggest selecting an ISO in the region of 800-1250 (this is just a good starting point you may have to adjust this to get exactly what you are looking for). Now look through the view finder of your camera at the scene you want to capture, in most DSLR cameras there is a light meter scale or indicator either at the bottom or on the side of the view you see when looking through the view finder (see images below)
What we want to do is set the exposure as if we wanted to photograph the colours in the sky, to get this exposure correct you will need to meter off the sky (focus on the sky by pressing the shutter button halfway) now you will need to either adjust your aperture or shutter speed, as you make adjustments to these you will see the indicator on the light meter move, adjust so that the indicator is on the 0 or in the middle of the light meter scale. Be careful not to make your shutter speed too slow as your image may end up blurry due to camera shake if you are hand holding. Once you have your settings re-compose your image focus on your subject and take a picture with your flash off. You should end up with a very dark subject, possibly even a decent silhouette.
From this image you will be able to determine if the colours you are getting in the sky are as you want them, if not follow these steps below:
Sky too dark options:Slow down the shutter speed or open up the aperture a little eg. Drop from f6.3 to f5.6
Sky too light options:Increase the shutter speed or close down the aperture eg. go up from f5.6 to f6.3
Once you have this sorted turn on your flash, set the exposure (output) on your flash to -1 (once again just a good starting point) now retake the image you have just taken and hopefully……BOOM!!! You have your image, if not what you looking for follow these steps below do not adjust your shutter speed or aperture as this will affect your back ground :
Subject very bright:Lower your flash exposure eg. from -1 to -1.3
Subject is too Dark:Increase your flash exposure eg. from -1 to -0.7
Whole image is too dark:increase your ISO.
Things to remember:
• Shutter speed and aperture adjusts the back ground • Flash exposure (output) adjusts the light on the subject • ISO adjusts the exposure of the whole image • Make all adjustments in 1/3 increments and test
The secrets to creating a successful photographs like these are:
• Be aware of the scene you are shooting ad how it is changing constantly and adjust accordingly • Pay attention to the background as well, not just the subject • Be careful not to over flash (over expose) the subject • Find a good balance between the ambient light in the background and the light from the flash.
Well I hope this tip has been helpful to you, keep shooting and may the light be with you.
Brendon Cremer
Brendon is an adventurer, conservationist, tour leader, specialist wildlife photographer and guide based in Nelspruit, South Africa. Brendon Guides and hosts photographic safaris around Southern and East Africa. Brendon has a deep respect and understanding for Africa and its wildlife and through this profound knowledge, Brendon’s photo safaris allow the traveller not only to enhance their photography, but also gain a lifelong admiration for Africa’s wildlife and culture.
- Web |
- More Posts(3)
Leave a Reply